Getting Started
To start using pic we need to download the tool first. The file and the source code are hosted in the codeberg,
so the download link will be pointed to their website.
Warning
This tool is still in experimental phase. It’s not recommended for production
Mac is not available yet. Although .NET provide build tool for Mac, I don’t have a machine to test the build.
1. Extracting the file
After downloading the file, extract it and there will be a folder named pic.
Linux x64
If we’re using CLI we can run the following command
unzip pic-0.0.1-linux-x64.zip
Inside pic folder we will get several files and a folder, however the most important are:
layers: This is where we store the PNG image that will be combined
config.json: This is the configuration file
pic: File that will be used to execute the tool in Linux or Mac
Windows x64
In windows, the file that will be used to execute the tool is pic.exe
2. Preparing Images
Take a look at the layers directory. We will find some folders there.
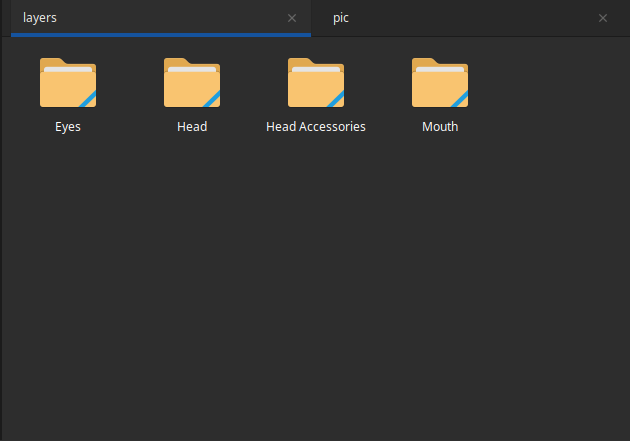
Layers directory content
Each of those folders contain images that we can use to generate image. Let’s open Eyes folder and see what’s inside.
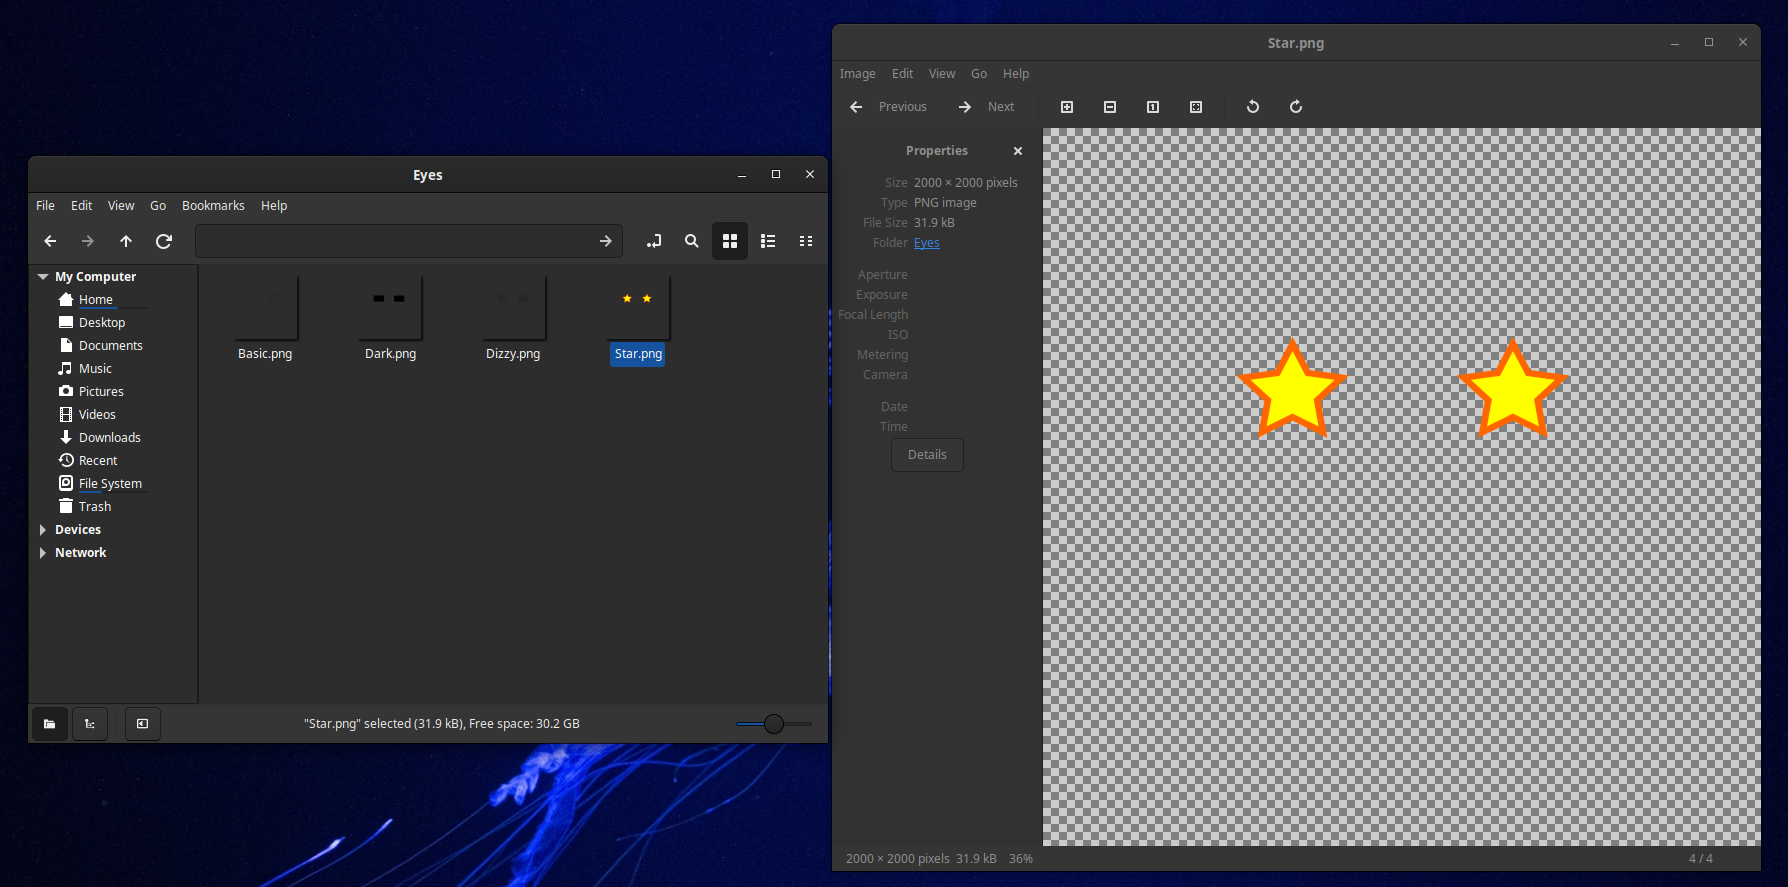
Eyes folder content
We can see that the image has transparent background and has PNG format. Try check images in other directory, they all have the same characteristics. Also notice that all of them have the exact same resolution.
We don’t need to change anything in this step. This sample already provide a guide for us if we want to add our own images. Things to note:
Use transparent background
Save it as PNG with the same resolution
Group them in a folder
Put the folder in layers directory
If you wonder why step 3 and 4 are necessary, we’ll learn it on the next step
3. Configuration
We can configure how pic combines images. It can be done by modifying config.json which already included in
the downloaded file.
{
  "name": "Gambar",
  "amount": 10,
  "batchSize": 4,
  "startTokenId": 1,
  "width": 1000,
  "height": 1000,
  "outputDirectory": "output",
  "unique": false,
  "layers": [
    "Head",
    "Eyes",
    "Mouth",
    "Head Accessories"
  ],
  "distribution": {}
}
There are a lot there, we’re not discussing all of the details but focus on what’s necessary to get started.
name: Name of the image in metadata and output folder, not the filename.
amount: How many images we want to generate
width: Width of image output, it can be used to resize the image
height: Height of image output, it can be used to resize the image
layers: The order of image combination, the first one will be placed in the background, then the next one is placed on top of it.
distribution: The image distribution
Let’s focus on understanding layers. When pic is combining images, it’s actually sticking multiple images
together. The question here, which image will be at the front and which one goes behind? That’s what layers
configuration all about. Consider this example below:
{
    "layers": [
        "bottom layer",
        "layer 1",
        "layer 2",
        "layer 3",
        "top layer"
    ]
}
We can visualize the configuration above like this
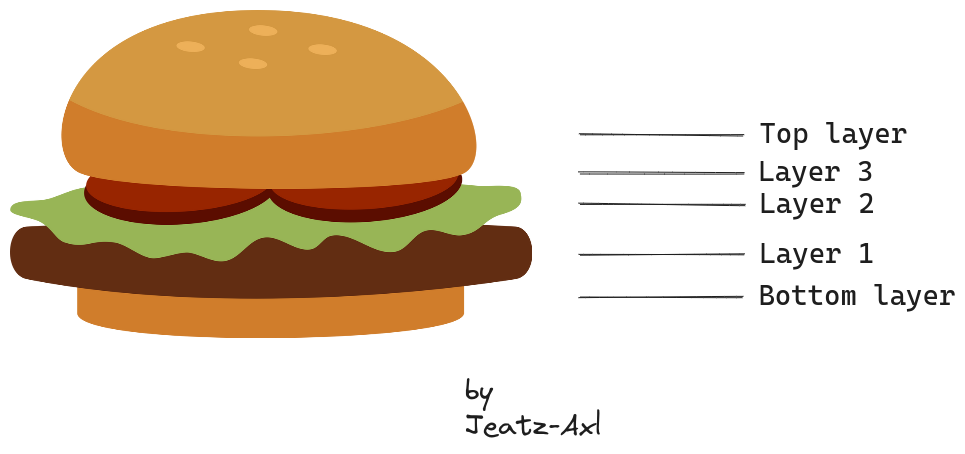
Now we get the idea what layers is. The next question is what name should we put there? It’s actually name
of folders inside layers directory. In the previous step, we already have a look at image sample in
layers directory. If we compare the name in layers configuration and folder inside layers directory,
they do match.
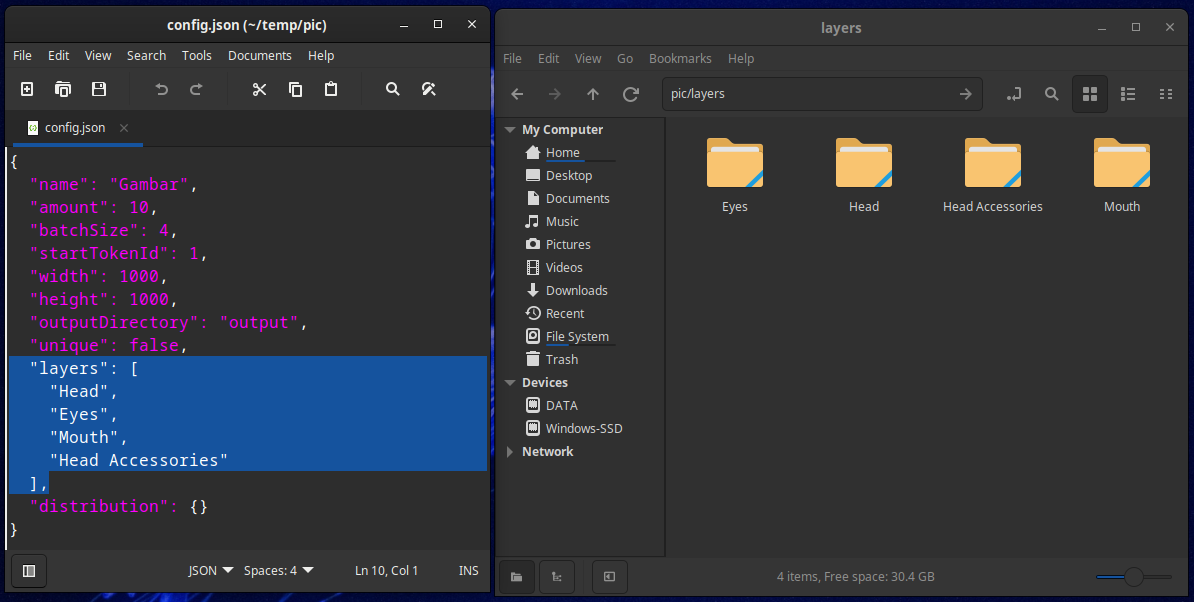
Layers configuration
Warning
The name in layers configuration is case-sensitive, make sure the folder name matches with what’s written
in the layers configuration. (e.g. head and Head are considered different)
Again, we don’t need to change anything in this step. Let’s use the default configuration and continue to the next step.
See also
4. Setup Distribution
Let’s try execute the tool.
Windows: Double click pic.exe
Linux/Mac: In the terminal go to pic directory then type
./picand press Enter
We’ll get a lot of text, but on the last line there is a message
Distribution is empty. Please update 'distribution' in config.json


Press any button to exit!
Let’s open config.json and the content should look like this
{
  "name": "Gambar",
  "amount": 10,
  "batchSize": 4,
  "startTokenId": 1,
  "width": 1000,
  "height": 1000,
  "outputDirectory": "output",
  "unique": false,
  "layers": [
    "Head",
    "Eyes",
    "Mouth",
    "Head Accessories"
  ],
  "distribution": {
    "Eyes": {
      "layers/Eyes/Basic.png": 0,
      "layers/Eyes/Dark.png": 0,
      "layers/Eyes/Dizzy.png": 0,
      "layers/Eyes/Star.png": 0
    },
    "Head": {
      "layers/Head/Blue.png": 0,
      "layers/Head/Gray.png": 0
    },
    "Head Accessories": {
      "layers/Head Accessories/Antenna.png": 0,
      "layers/Head Accessories/Hairless.png": 0,
      "layers/Head Accessories/Three-lines.png": 0
    },
    "Mouth": {
      "layers/Mouth/Basic.png": 0,
      "layers/Mouth/Canine.png": 0,
      "layers/Mouth/Um.png": 0
    }
  }
}
Notice the change on the distribution part. Previously there was nothing on distribution, but after we
executed the tool the configuration has been updated.
Whenever distribution is empty, pic will rummage through layers directory and trying to find
directory that mentioned in the layers configuration. If the folder is there, it will open that directory
and taking note a list of image and its filename. Once it’s done, it will put its finding on
distribution configuration.
Note
If we put a new folder of image in the layers directory, it will not include the image automatically unless
we clear the distribution configuration by setting it to "distribution": {}
So what is distribution by the way?
Let’s say we want to create 12 random images of robot. We want 60% of them have blue head while the rest have gray head. The 60% is what we call distribution. This is how we configure it
...
    "Head": {
      "layers/Head/Blue.png": 60,
      "layers/Head/Gray.png": 40
    },
...
So the value we should put is a percentage unit. When we put 60, it means 60% of total image. Back to our
configuration, after setting the distribution pic will do the math using a simple formula
Notice that the result will be round up, which means 60% of 12 is not 7.2 but 8. This decision is taken
because we can not take fractional number as the value (how would you think there are 7.2 images with blue head?).
If we round down the result then we may not be able to produce exact amount of image because some image will
miss some part.
Now we get the idea what distribution is, you can start fiddling with the number or we can use the following configuration
{
  "name": "Gambar",
  "amount": 10,
  "batchSize": 4,
  "startTokenId": 1,
  "width": 1000,
  "height": 1000,
  "outputDirectory": "output",
  "unique": false,
  "layers": [
    "Head",
    "Eyes",
    "Mouth",
    "Head Accessories"
  ],
  "distribution": {
    "Eyes": {
      "layers/Eyes/Basic.png": 30,
      "layers/Eyes/Dark.png": 30,
      "layers/Eyes/Dizzy.png": 20,
      "layers/Eyes/Star.png": 20
    },
    "Head": {
      "layers/Head/Blue.png": 50,
      "layers/Head/Gray.png": 50
    },
    "Head Accessories": {
      "layers/Head Accessories/Antenna.png": 30,
      "layers/Head Accessories/Hairless.png": 10,
      "layers/Head Accessories/Three-lines.png": 60
    },
    "Mouth": {
      "layers/Mouth/Basic.png": 50,
      "layers/Mouth/Canine.png": 30,
      "layers/Mouth/Um.png": 20
    }
  }
}
5. Generate Image
All set! Now let’s execute the tool again.
Windows: Double click pic.exe
Linux/Mac: In the terminal go to pic directory then type
./picand press Enter
then after sometime, we will find there are new folders called output and log. Our image is generated
inside output folder. The log folder is just for debugging purpose or if we want to understand more what
pic did.
Open output folder and we will find a single folder named Gambar. Let’s peek inside it and we will find two folders, images and metadata. We can tell that our image is inside images folder, let’s open it!
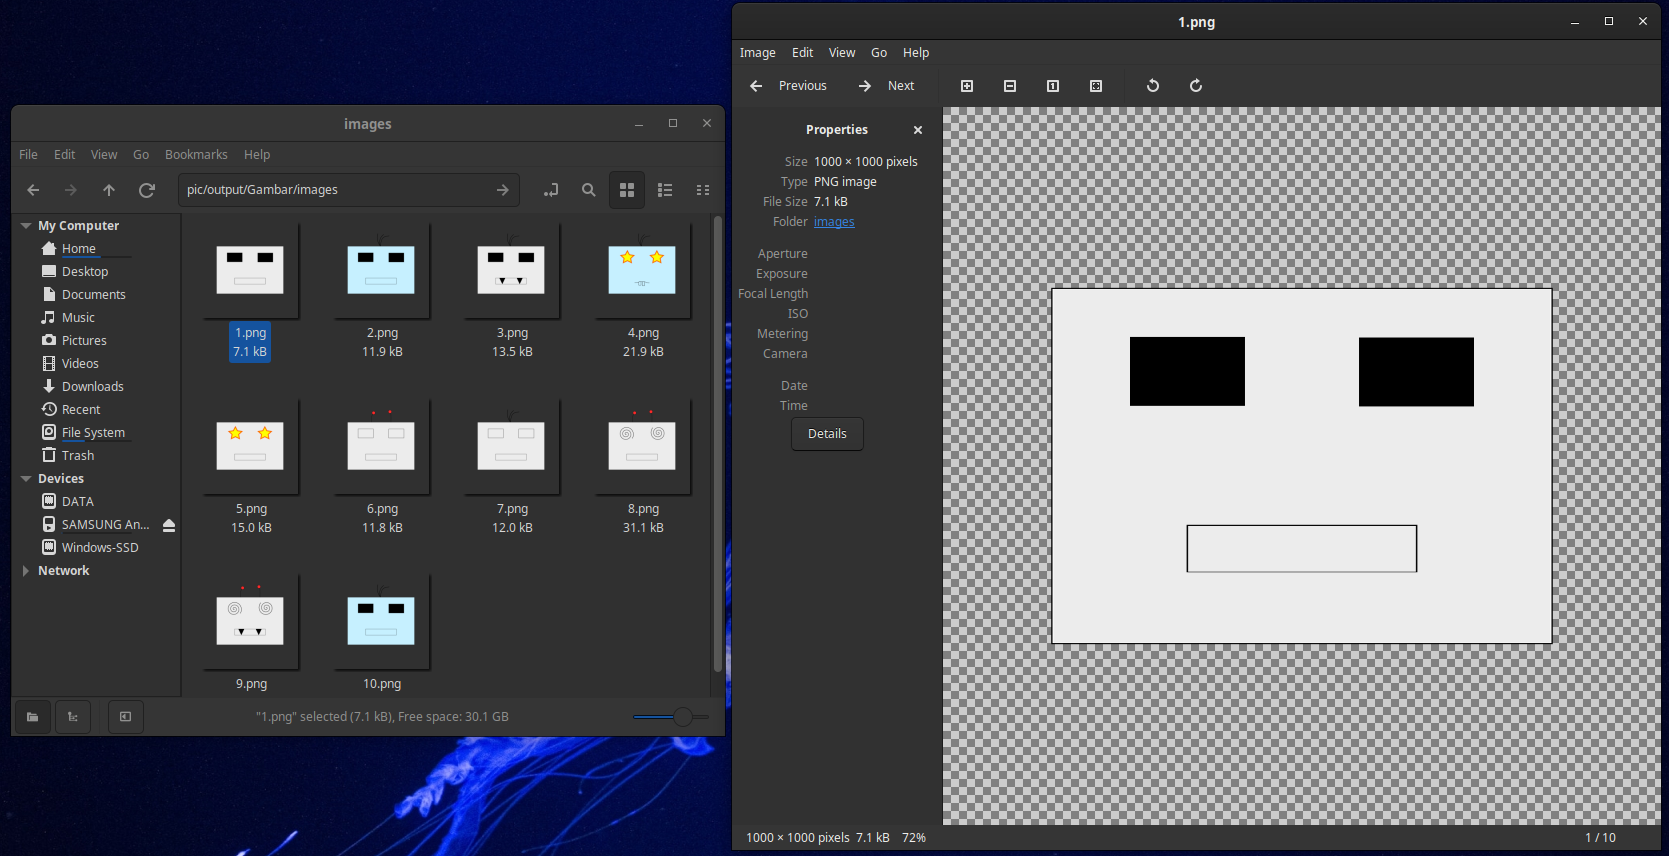
Output
Eh? Your images are different? Well, that means it works! pic will generate random image combination
everytime we run it. So it’s not guaranteed we’ll get the same result depends on how many possible combination.
Anyway, that’s an overview on how to get started. However, we missed one folder though which is metadata. If you’re interested to know more about it, go to the next page.